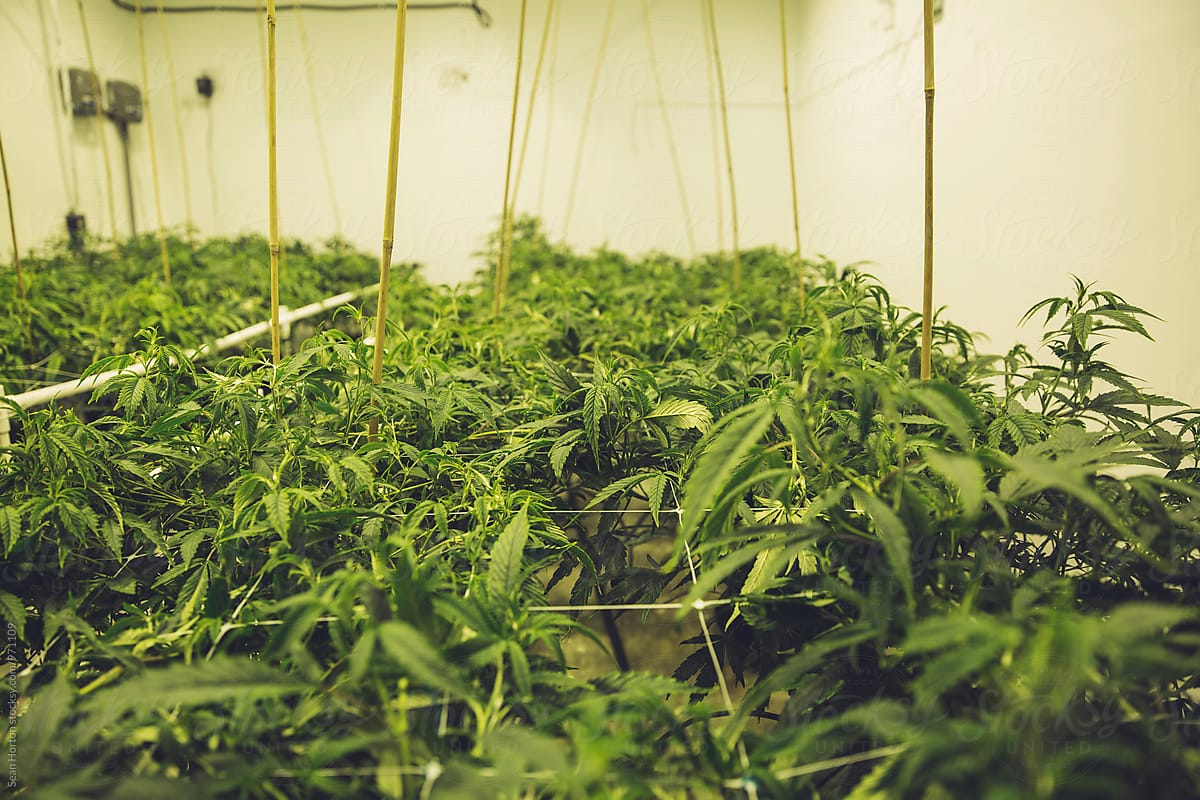
A garage can be perfect for a grow room setup, I will show you why in a moment.
Read on to know how to build a grow room in a garage step by step and learn about DIY grow rooms, homemade grow box ideas, and more.
Let’s go right in:
How To Build A Grow Room In A Garage?
You might know this, but even if, allow me to jog your memory a bit. A grow room is an interior space designed for indoor gardening.
The perfect indoor grow setup should be sealed entirely apart from the strategic ventilation.
Check Grow Room Accessories you would need
Origin of Marijuana Grow Room
The first people to come up with a grow room were marijuana growers. They were looking for a secure location to grow the herb away from law enforcers.
Let’s now come to size.
How Big Should A Grow Room Be?
Its size depends on the intended purpose. In some cases, it will just be a small area created from your spare bedroom or a converted garage.
It can also be gigantic. For example, a commercial growing tent can be so large that calling it a plant factory, an indoor garden, or an indoor farm won’t seem out of hand.
What’s The Difference between a Grow Room and a Greenhouse?
Unlike a grow room, a greenhouse isn’t wholly sealed, so they significantly differ. However, a grow tent is closer to a grow room. It is considered a mobile grow room.
Advantages Of Growing Plants In A Grow Room
Growing in your grow room will give you several benefits.
Here they are:
- Control – It’s easier to manage light, temperature, and even humidity.
- Space Economy – Grow rooms are one of the better choices for small-space gardening.
- Protection – Growing plants are protected from nuisances such as bugs, dust, harsh weather conditions, or destruction by animals and humans.
- Better ROI – Plants are in a better overall condition and yield more. In the end, you will pocket more bucks.
Things to Consider When Building A Grow Setup For Indoors
Before we finally see how to build a grow room in a garage step by step, let us look at some of the factors to consider when setting up a growing room.
For the best grow room setup, consider the following;
What Do You Need To Build A Growing Room?
Click Here For The Best Products To Build A Grow Room
You shouldn’t use materials that can mold your walls. You may have to change the garage walls if it’s currently made of moisture-holding materials like wood.
- Flooring –Water may drip from the growing trays or pots. Your grow room’s floor should be at least cemented, tiled, or vinyl floored to withstand water.
- Lightening – lights are crucial to indoor gardening; your garage grows room should accommodate sufficient grow light fixtures, even if it’s one of those small grow rooms that people start with. A garage with windows allows natural light during the daytime and, in the process, saves on electric usage.
- Ventilation – The growing room should be very well-aerated. Good ventilation will also help eliminate any foul odor coming from the room. You will need to provide an exhaust fan and a vent.
- Electrical source – Your grow room also needs an electrical source. Luckily, any standard wall installed in your garage or nearby will do.
- Water supply – You will be watering your plants- even if occasionally. A nearby water source is therefore fundamental to your success.
Setting Up a Grow Room Step By Step (In Your Garage)
With the considerations out of our way, let’s see how to build your own grow room.
Step 1 – Pick an Ideal Space: Decide on the size and the exact spot where you will site your upcoming grow room. You can convert the whole garage and partition a space for the grow room.
Pick a spot where installing all the necessary provisions like lighting, water point, and ventilation will be convenient.
Step 2 – Draw Your Floor Plan: Now, summon the designer in you. Map out all your ideas for the grow room of your dreams on paper.
Add dimensions plus placement of crucial elements such as intake vents and exhaust fans.
You should also figure out the exact measurements at this stage- I am talking about the room’s square plus cubic feet.
This is important for purchasing the right size of lights and vents. And fans later on!
Something else to decide here is where your plants will go in the room.
Indeed, this will be influenced by how you have chosen to place the lights and exhaust fan(s)
Step 3 – Insulating the Walls: It’s now time to handle the walls…
Set up the partition walls (if you choose to partition your garage).
Otherwise, now line your walls and the floor of your proposed room with Mylar. This prevents moisture damage.
The Mylar should be directly tacked on all the walls as flatly as possible.
Mylar also reflects the light around your entire room, thus fully utilizing your light source.
Step 4 – Install Lighting: You will need enough lights. Their number will be dependent on the size of the grow room. Install one 600-watt light per 5-6 feet area as a general guide.
Lights make heat, so you will need a bigger extractor fan if you have more lights.
And if you will be using natural light during the day, you will need to connect your lighting system to a relay & timer system.
Step 5 – Install Exhaust Plus Intake Fans: Expelling hot air and drawing in some fresh air is very important.
You should direct incoming air to the bottom area while it should extract the hottest air from the top spot since it is here that it flows naturally.
Generally, the output fan should be more significant than the input fan, and you should set the system such that there will be an exchange of air around 30 times every hour.
Again, positioning your fan’s airflow towards the light bulbs will help to keep the temperature down.
Also, HAF (Horizontal Airflow) fans help maintain an even humidity and temperature throughout you grow room. This reduces condensation on the room walls, meaning you will reduce disease incidences on your plants.
Step 6 – Water System: Plants dry out more quickly with lights, so ensure you water as frequently as required.
Thus, connect your water system.
A hydroponics system can automate this bit, so you may add it as part of your grow room setup.
Here is a fact:
Different crops have differing light, humidity, and even soil requirements. Therefore, Research the targeted plants to know their optimum conditions to ensure your grow room will be productive.
Step 7 – Extra Tools: Fit any other tools you may need like a humidity meter, pH meter, thermometer, etc.
Although not crucial, they help you diagnose your plants as soon as you detect problems.
Step 8 – Set Up The Containers: Set up your grow room containers. You can go for hydroponics or soil, depending on your budget.
Step 9 – Planting: Now, plant your germinated seeds or whatever else you were to produce in the grow room.
Build a Cheap Indoor Grow Setup
You can tweak a few things and still have a great grow room if you are on a budget.
Let’s skim through them –
- For growing medium, use soil rather than hydroponics. It’s by far much cheaper and also has less work.
- Go for CFLs (compact fluorescent light) for lighting, cheaper yet as efficient as other alternatives. LEDs included
- Instead of Mylar for reflection, use flat white paint. It’s a budget option, yet it still reflects more light (up to 85%). Plus, surfaces painted flat white is easier to keep clean.
Wrapping Up
So, that’s how to build a grow room in a garage step by step. We have also seen other grow room ideas to make the process cheaper and the most crucial consideration. It’s now your turn. Please share your thoughts about the perfect indoor grow setup room from the comments button below. We will be happy to reply.
Connect with us about further queries. Good luck!
Related Reads:
Cheap Grow Lights For Indoor Plants
Small Greenhouse Heaters With Thermostat
Led Distance From Plants
Marijuana Grow Bags


